User Guide
Protocol Builder User Guide
1. Overview
Protocol Builder helps make it faster and easier to develop research protocols that comply with IRB and regulatory standards. It's designed to be simple to use, but this guide can help you get started and learn how to take advantage of the advanced features.
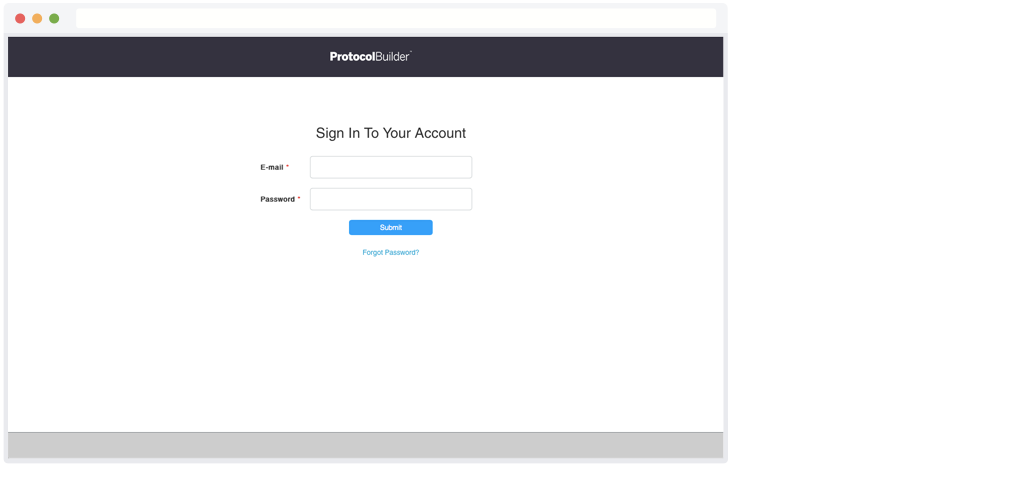
2. Sign In
If you're signing in for the first time, click the registration link that was emailed to you and follow the instructions. If you can't find the link, please call the Help Desk at 844-563-1042.
If you're already registered, go to protocolbuilderpro.com or open the iPad app to sign in with your email address and password. If you forgot your password, click "Forgot Password?" and instructions to reset your password will be emailed to you.
3. Download the App
In addition to being accessible through a web browser on laptops, desktops, and tablets, Protocol Builder is available as an iPad app in the iTunes Store.
- Visit the iTunes landing page here or visit the iTunes App Store and search for Protocol Builder.
- Download as you would any other app. Once it's downloaded, you'll need to register or sign in with your user name and password.
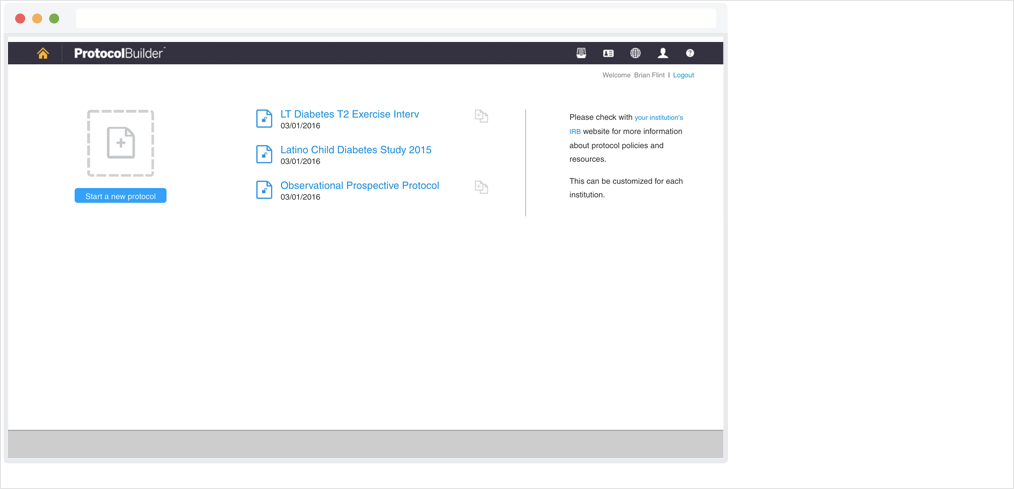
4. Home Screen
After you sign in, you'll be taken to the Home screen. On the Home screen, you'll see a button to start a new protocol and links to the last three protocols that were saved. You'll also be able to access the global navigational icons.
5. Navigational Icons
Protocol Builder has navigational icons at the top left,top right,and bottom right of the screen.
![]()
Top Left
- Home – Return to the Home screen where you can start a new protocol and access recently saved protocols.
Top Right
- Dashboard – Go to the Dashboard, which gives you a snapshot of the protocol you are working on. This button is only visible when you are viewing or editing a protocol.
- Protocols – View a list of any saved or shared protocols.
- Contact List – Manage your list of contacts.
- Resource Center – Access sample protocols, downloadable forms and external links to important educational and regulatory information. See Resource Center for more details.
- Profile – Update your contact information and password.
- Help – Take a tour of Protocol Builder, access the user guide and find Help Desk contact information.
Bottom Left
- Contents Menu – Use this menu to view the contents of your protocol and jump directly to any section. Click the menu once to open and again to close it.
6. Information Icons
As you work on a protocol, you'll see Information ("i") icons that are designed to guide you through the process. Rollover the icons to view relevant instructions and tips developed by protocol writing experts.
7. Resource Center
This area contains resources to help you develop protocols that meet IRB and regulatory standards. Click the globe icon in the top right corner of any page to go to the Resource Center.
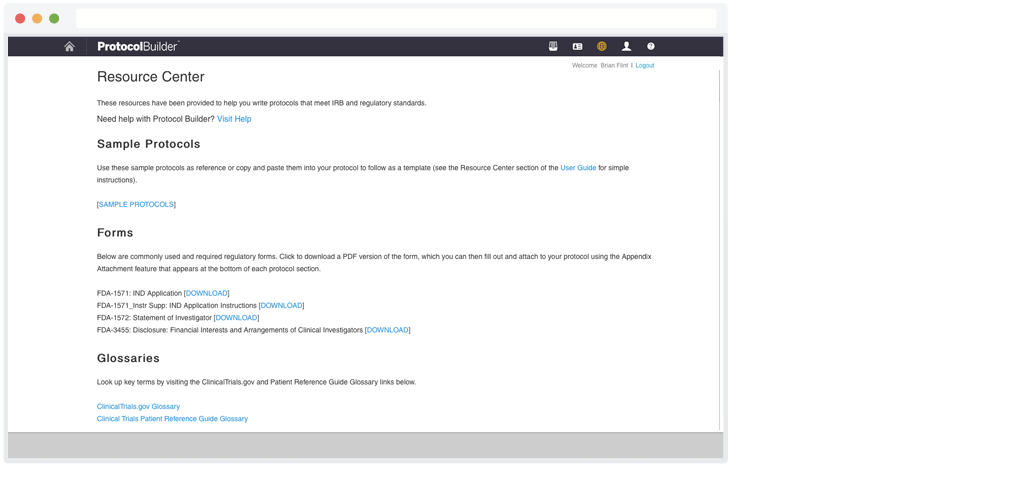
Protocol Samples
These samples are well-written protocols that you can use for reference. Click on the name of the protocol to view a PDF version. When you're viewing the sample, you can click on a hyperlink in the contents to go directly to that section.
You can also copy and paste content from the sample protocols into your protocol to use as a guideline as you write:
- Highlight the section of the sample protocol you'd like to use.
- Copy using "Ctrl" plus the "c" keys on a PC or "command" plus the "c" keys on a Mac.
- Use the Contents Menu to navigate to the section of your protocol where you'd like to paste the content.
- Paste the copy using "Ctrl" plus the "v" keys on a PC or "command" plus the "v" keys on a Mac.
Glossaries
Links to reputable clinical trials and patient reference glossaries are provided.
Forms
Commonly used and required forms are available for you to download. Click DOWNLOAD next to the form you'd like to use. It will be downloaded as a PDF file.
You can fill out the form and use the Attach Appendix feature to attach it to your protocol (see Appendix Attachments for instructions).
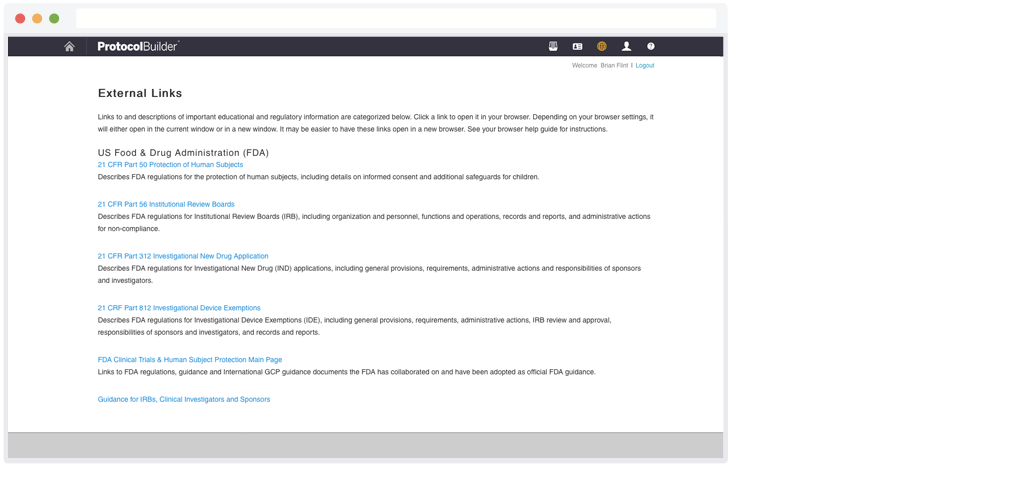
External Links
Links to and descriptions of important educational and regulatory information are categorized in this section. Click a link to open it in your browser.
Depending on your browser settings, it will either open in the current window or in a new window. It may be easier to have these links open in a new browser. See your browser help guide for instructions on changing your settings.
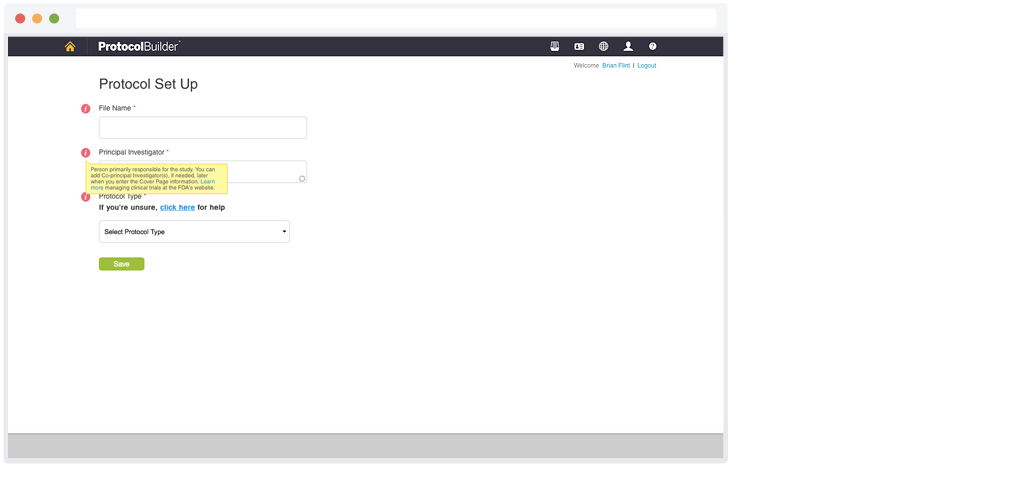
8. Start a New Protocol
- Click the "Start a new protocol" icon on the Home screen or Protocols page.You can also duplicate an existing protocol to repurpose (see below).
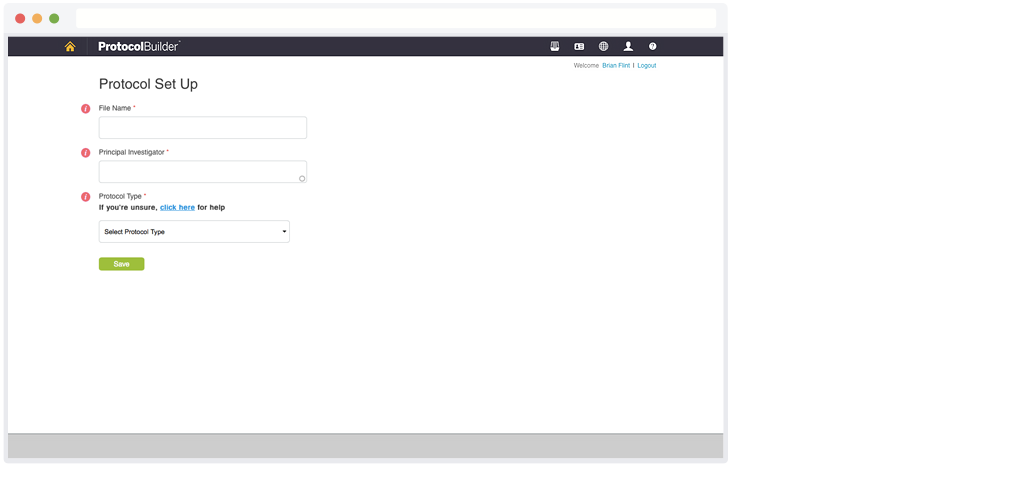
- Enter a file name to identify the protocol. This is different than the Protocol Title, which you'll be asked to enter later.
- Enter the name of the Principal Investigator. If it exists in your contact list, it will come up as you type and you can simply select it.
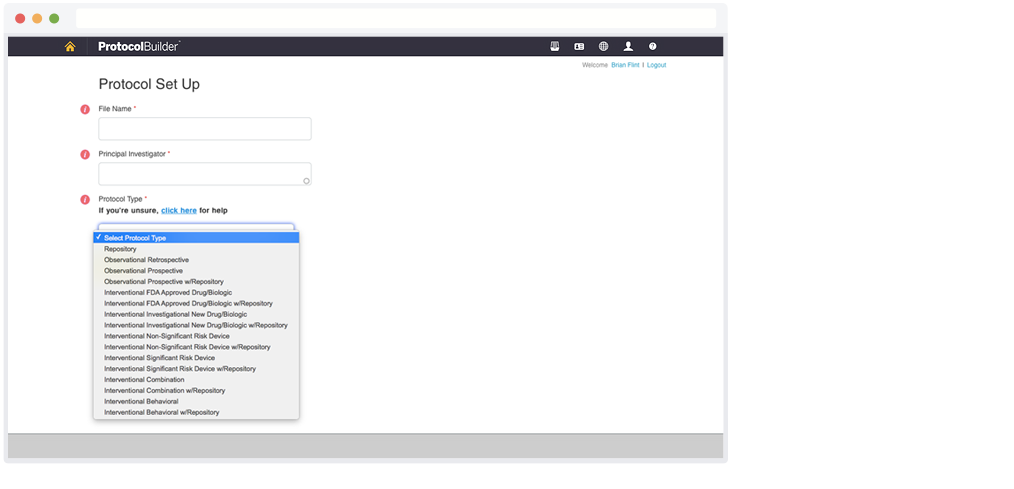
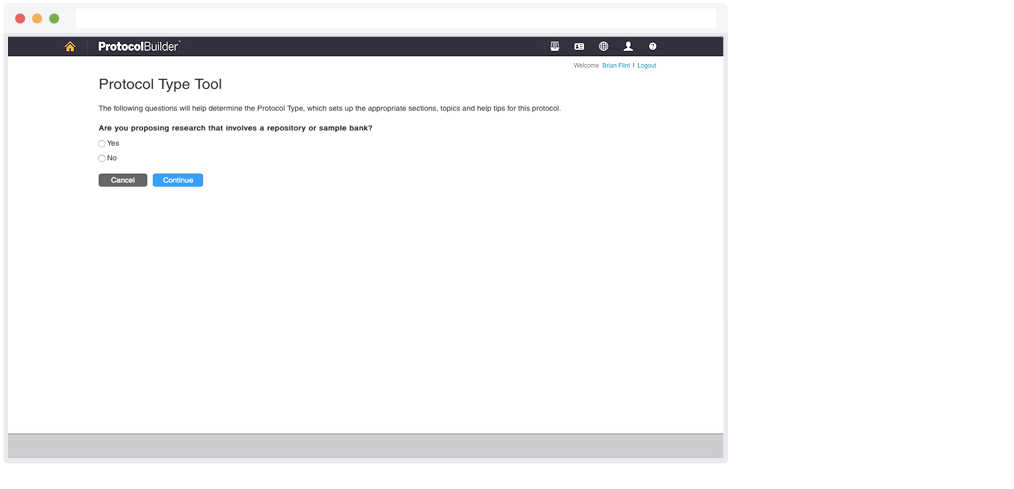
- Select the Protocol Type from the drop-down list. The Protocol Type is used to automatically set up the appropriatesections and tips for your protocol. If you're unsure, click the provided link and you'll be asked a series of questions to help determine the Protocol Type.
- Click Save. Your information will be saved and you'll be taken to the Cover Page of the protocol, which is explained in the next section.
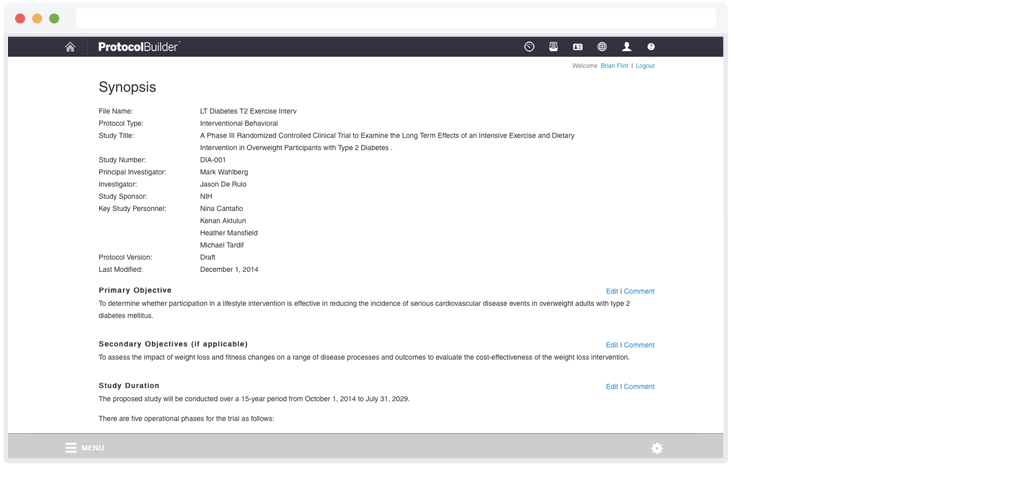
9. Cover Page
The information entered on this screen will be used to automatically build the Cover Page of the protocol. The file name and Protocol Type will be pre-filled with the information you entered when you started the protocol.
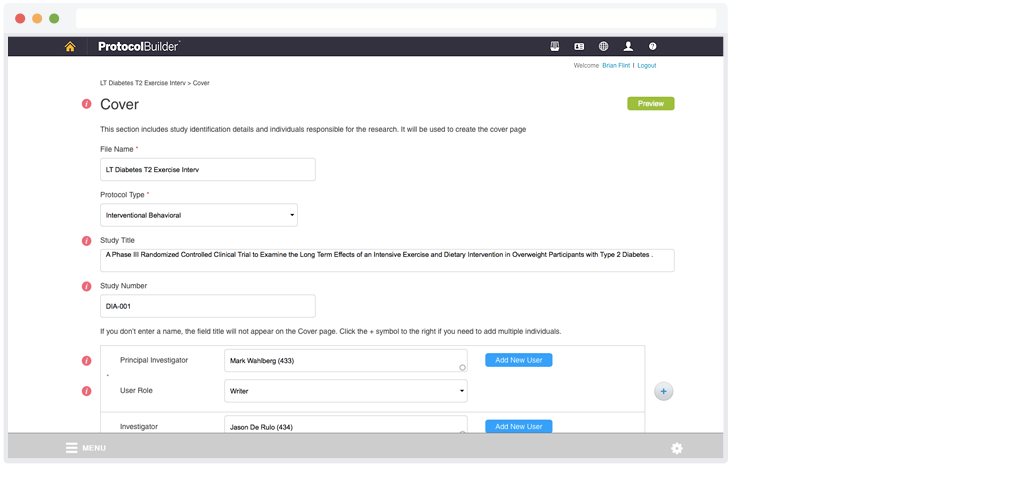
- Enter the study title and number.
- Enter the individuals responsible for the research. If you do not enter a name, the field title will not appear on the Cover Page of your protocol.
- If the person is in your organization, you can start typing the name and select it when it appears.
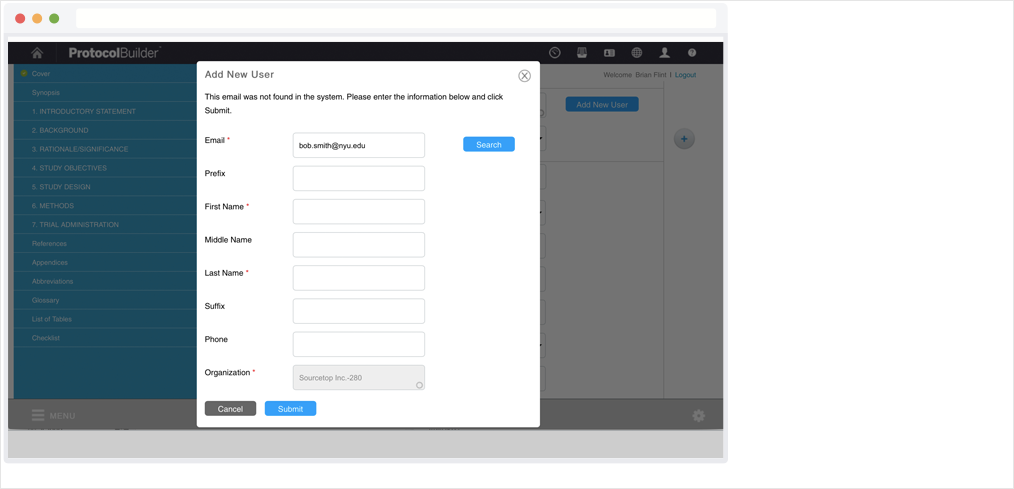
- If the person is not in your organization, click the Add New User button. In the pop-up, enter an email to search the entire Protocol Builder database.
- If the user is found, the information will be prepopulated.
- If not, you can type it in manually. The new user will be added to the protocol and saved to your Protocol Builder contact list.
- If you need to add more names, click the + button for additional fields.
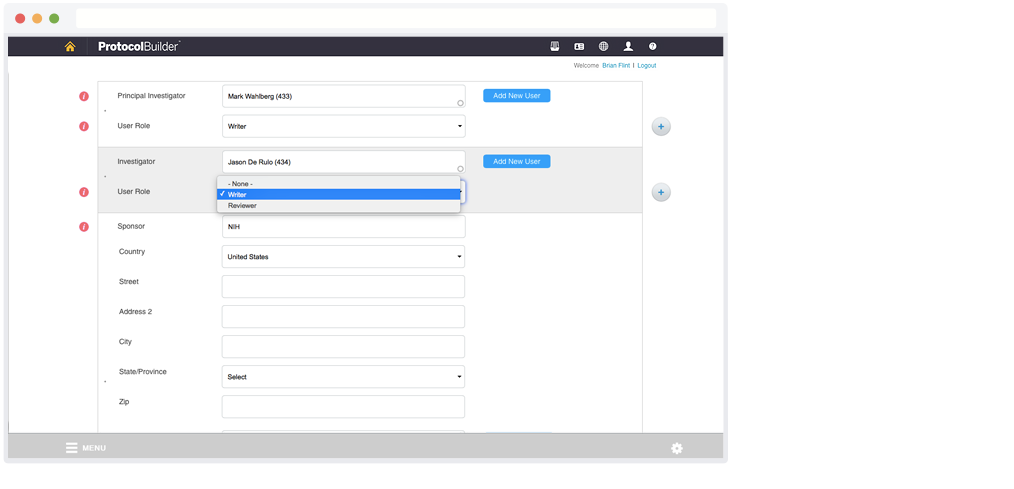
- Select a User Role for each individual:
| User Role | Permissions |
|---|---|
| Writer | Write, edit and duplicatethe protocol |
| Reviewer | Read and comment only – can not write, edit or duplicate the protocol |
The role you assign to a person is protocol-specific, and applies only to the protocol you are setting up. A user can have a different role on another protocol.
As the originator of the protocol, you will automatically be assigned the role of Owner, which gives you permission to write, edit, and duplicate the protocol. You are also the only person who can delete the protocol.
10. Open an Existing Protocol
From the Home Screen
- Visit the Home screen to see the three most recently saved protocols.
- Click on a file name to open it.
From the Protocols Screen
- Visit the Protocols screen to see a full list of your protocols.
- Select a file name to open it.You can click on a header to sort the list.
When you open a protocol, you'll be taken to the Dashboard
11. Duplicate a Protocol
If you have saved at least one version of a protocol, you will see a cloning icon next to the title on the Home or Protocols screen. Click this icon to duplicate the entire protocol including references and use it as the basis for a new protocol.
- You will be asked to enter a name for the new protocol, which will then be saved and added to your protocol list.
- The original protocol will not be changed or deleted.
- You can only duplicate a protocol if your User Role on that protocol is Owner or Writer.
12. Write or Edit a Protocol
To write or edit a protocol, navigate to the section you want to work on and start typing or revising text in the edit box. While you're working on a topic, you can use the following advanced editing features.
12-a. Editing Toolbar
You can use the toolbar to bold, italicize, underline, strikethrough, right justify, center justify, right justify, bullet, number, indent, and outdent text. You can format text in two different ways:
- Click the appropriate format button and begin typing. Click the button again to end formatting.
- Select (highlight) the text you'd like to format and click the appropriate format button.
Remove Bullets or Numbering
If you'd like to remove bullets or number, place your cursor in the line where you'd like it removed or select (highlight) the text you'd like change. Then click the bullet or number button again.
Advanced Editing Tools
The toolbar also has advanced editing tools that allow you to insert abbreviations, references, footnotes and charts or tables, undo/redo changes, and add/remove hyperlinks. These features are explained in the following sections.
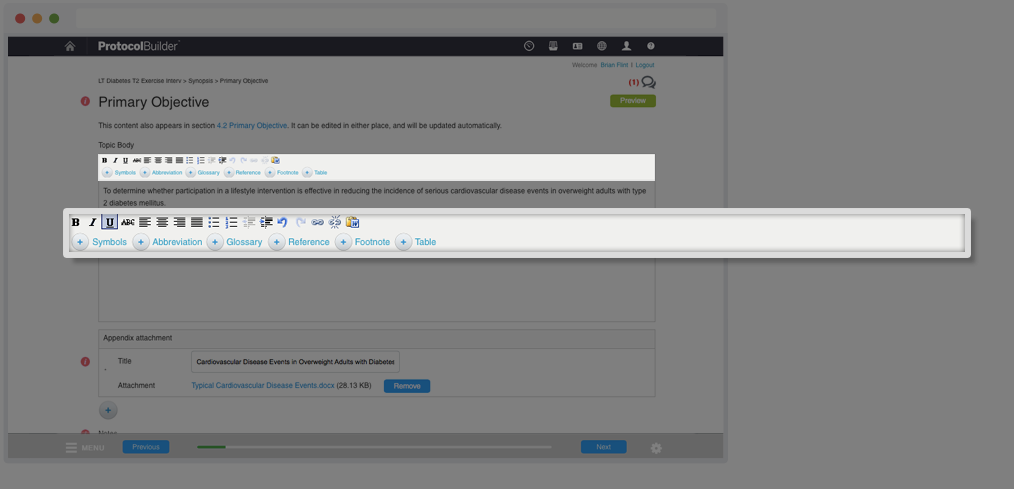
12-b. Abbreviations
The abbreviations you enter using this tool will be used to build the Abbreviations page at the end of the protocol.
Add an Abbreviation
- Type in the abbreviation, and then use your cursor to select (highlight) it.
- Click the Abbreviation button.
- Type the full term into the pop-up box, and click Save. The abbreviation will now have a dotted indicator line below it, which will not appear in the printed protocol.
Edit or Delete Abbreviation
- Click the abbreviation in the text. The Abbreviation button will be highlighted.
- Click the Abbreviation button.
- Edit and click Save or click the Remove button.
12-c. Glossary
The glossary terms and definitions you enter using this tool will be used to build the Glossary page at the end of the protocol.
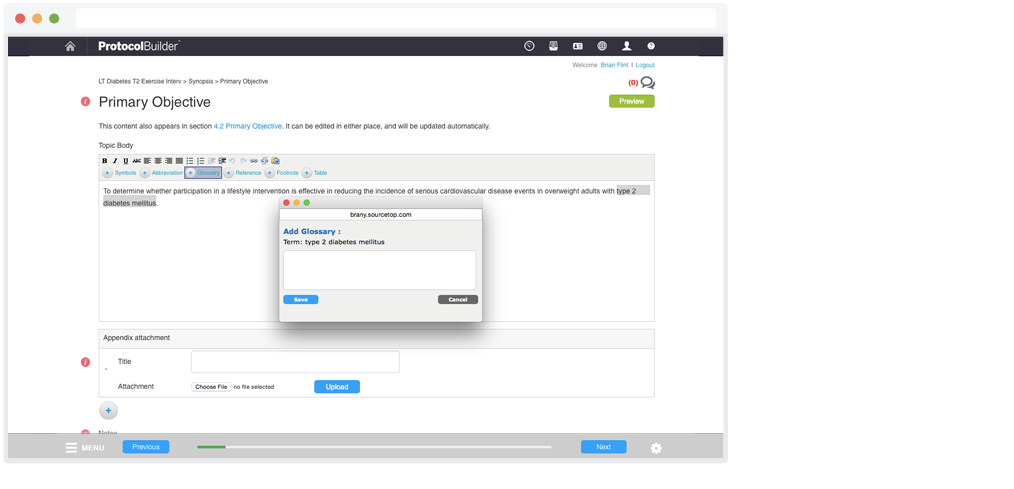
Add a Glossary Term
- Type in the term, and then use your cursor to select (highlight) it.
- Click the Glossary button.
- Type the definition into the pop-up box, and click Save. The term will now have a dotted indicator line below it, which will not appear in the printed protocol.
Edit or Delete Glossary Term
- Click the term in the text. The Glossary button will be highlighted.
- Click the Glossary button.
- Edit and click Save or click the Remove button.
12-d. References
The references you enter using this tool will automatically be numbered and used to build the References page at the end of the protocol.
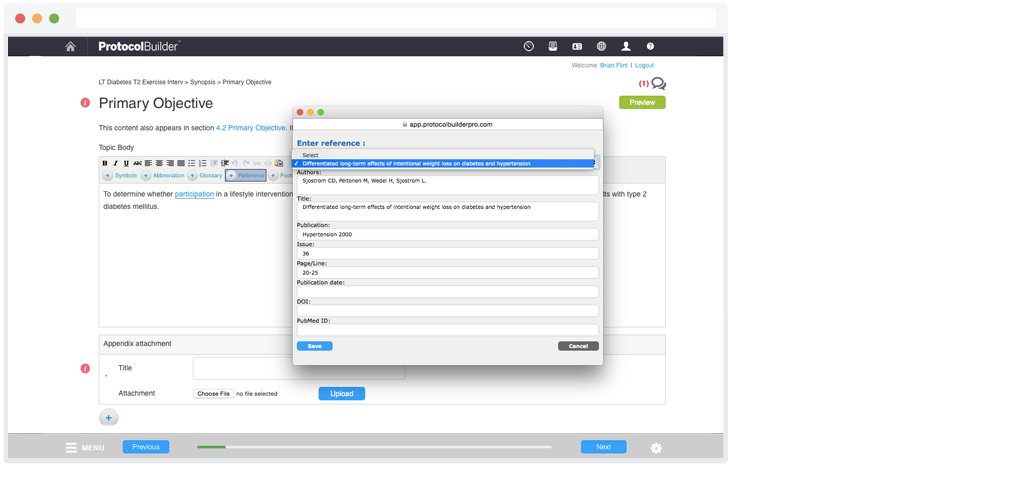
Add a Reference
- Place your cursor where you'd like the reference to appear in the text.
- Click the Reference button.
- Enter the information into the pop-up box, and click Save. You'll see an "R" and the number of the reference appear where you had your cursor.
Edit or Delete a Reference
- Click the "R" in the text. The Reference button will be highlighted.
- Click the Reference button.
- Edit and click Save or click the Remove button.
12-e. Footnotes
The footnote you enter using this tool will be numbered automatically and the relevant copy will appear at the bottom of the page.
Add a Footnote
- Place your cursor where you'd like the footnote to appear in the text.
- Click the Footnote button.
- Enter the information into the pop-up box, and click Save. You'll see an "F" and the number of the footnote appear where you had your cursor.
Edit or Delete a Footnote
- Click the "F" in the text. The Footnote button will be highlighted.
- Click the Footnote button.
- Edit and click Save or click the Remove button.
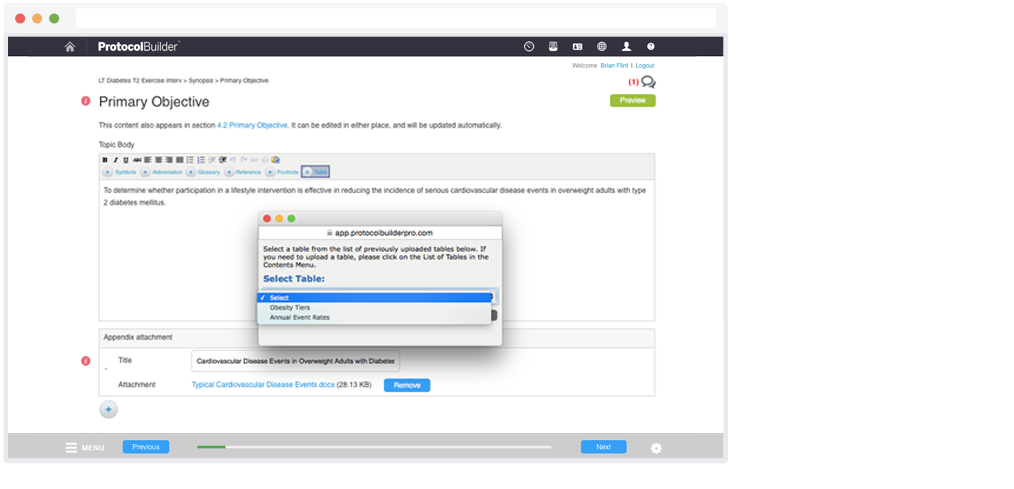
12-f. Tables
You can use the Table button to insert tables, chartsor imagesinto the protocol. The tables, charts or images you insert will be used to build the List of Tables page at the end of the protocol.
Before you can insert a table, it must be uploaded on the List of Tables page. You can upload any file that meets these specifications:
Size: Files must be less than 8 MB
Allowed File Types: pdf, jpg, jpeg, png, gif, xlsx, xls
Upload a Table
Please note that tables can only be uploaded using a desktop or laptop. They can't be uploaded using the tablet app.
- Navigate to the List of Tables section by selecting it from the Dashboard or Contents Menu.
- Click the Add Table button in the top right corner.
- Enter a title, click Choose File and select the file you'd like to insert.
- Click Upload then click Save when the upload is complete.
Insert a Table
- While you're editing a section, place your cursor in the spot where you'd like to insert the table, chart or image.
- Click the Table button.
- Select the file from the drop-down list and click Add Table.
Edit or Delete a Table
- Navigate to the List of Tables section by selecting it from the Dashboard or Contents Menu.
- To remove a table, click the Delete button next to the name of the table you'd like to remove. Click Delete again to confirm. To update a table, click the Edit button next to the table name. Make your changes and click Save.
12-g. Undo/Redo
Click the Undo button to cancel the last change. After you use Undo, you can click the Redo button to revert back to the previous state.
12-h. Link/Unlink
Use the Link/Unlink buttons to insert/remove links to website URLs in the protocol.
Insert a Link
- Type in the text you'd like to link and user your cursor to select (highlight) it.
- Click the Link button.
- Enter the link information in the pop-up box and click Save
Edit a Link
- Click the linked term in the text. The Link and Unlink buttons will be highlighted.
- Click the Link button.
- Edit the information in the pop-up and click Save.
Remove a Link
- Click the linked term in the text. The Link and Unlink buttons will be highlighted.
- Click the Unlink button. The link will automatically be removed.
12-i. Notes
As your editing a section of the protocol, you can write notes in the Notes box near the bottom of the screen. These notes are for your reference only and will not be included in the printed or downloaded version of the protocol.
12-j.Appendix Attachments
You can add attachments while you are working on a specific section of the protocol. A list of attachments will be compiled automatically in the Appendices section, and the attachments will be included at the end the protocol when you print or download it.
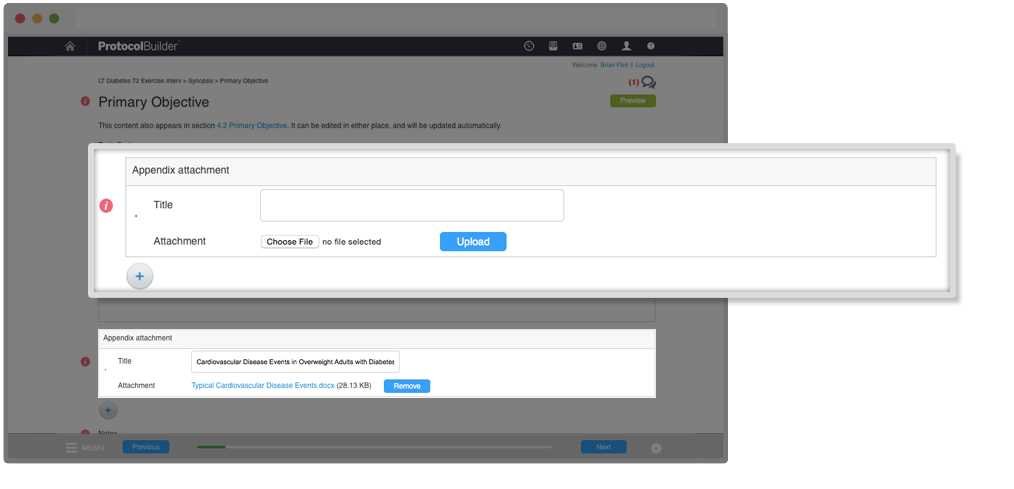
- Enter a title for the attachment.
- Click the Choose File button and select the file you'd like to attach.
- Click Upload to complete the attachment. If you need to add another attachment, click the + button below.
Keep in mind that common and required regulatory forms are available for download in the Resource Center.
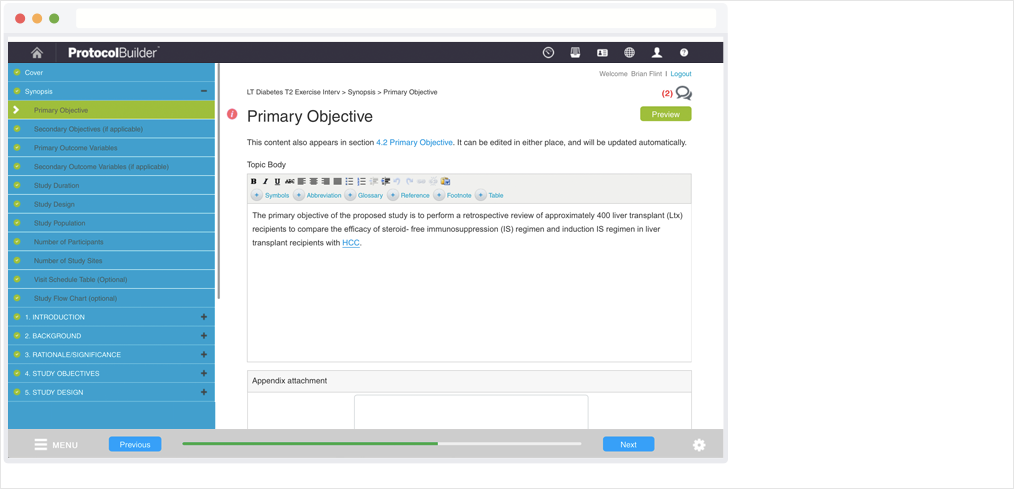
12-k. Linked Sections
Certain sections in the Synopsis need to appear verbatim in other sections. For instance, the Primary Objectives section in the Synopsis is repeated in section 4. Study Objectives
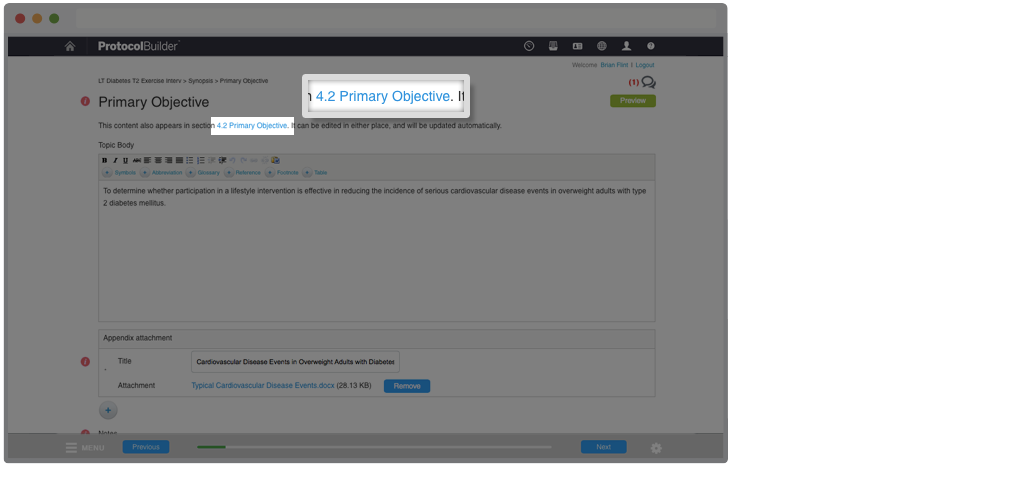
These sections are noted and automatically linked in Protocol Builder. When you update copy in one section, it will be update in the other as well. This way, you don't have to enter information twice or ensure it's updated in both places.
12-l. Related Sections
Some sections of the Synopsis need to be fleshed out in more detail later in the protocol. For instance, Study Duration in the Synopsis should be described more fully in section 5. Study Design.
When you're working on these sections, you'll see a reminder to make sure content is accurately reflectedin both places. There will also be a link that allows you to jump back and forth between them easily.
12-m. Special Symbols
You can insert special symbols (see list below) while you're writing:
- Place your cursor where you'd like to insert the symbol.
- Click the Symbol button. A pop-up with a list of symbols will appear.
- Select the symbol you'd like to insert and click Insert Symbol. Click Cancel to close the pop-up without inserting a symbol.
You can delete symbols the same way you'd delete regular text with the backspace or delete keys on your computer or iPad.
Available Symbols
+ - × ÷ /
<> ≤ ≥ = ≠ ˜
@ # $ % &
∞ α β μ μ ϑ ϒ
© ℗ ® ℠ ™
13. Save Draft or Publish
As you're writing or editing a protocol topic, you'll see Save Draft and Publish buttons at the bottom of the screen:
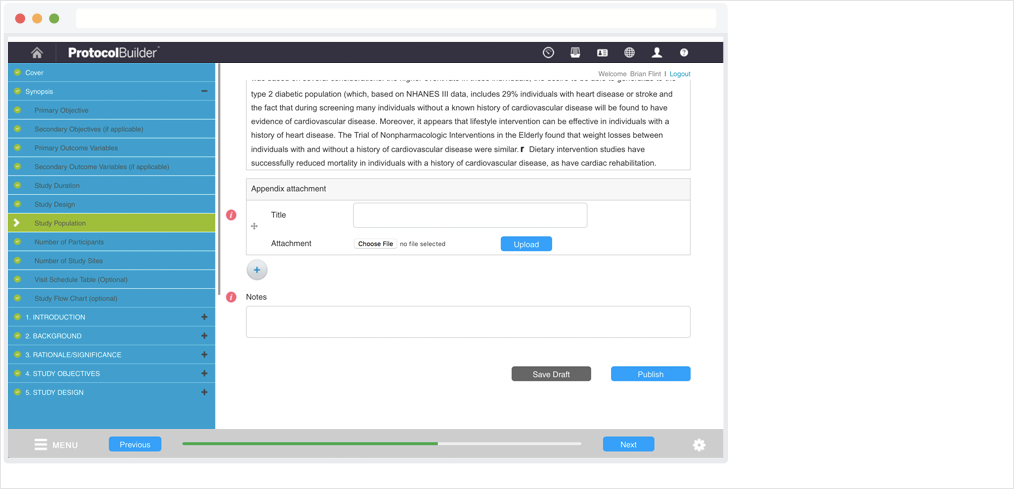
- Save Draft – Click to save a draft of the topic you are working on. Once a topic is saved, a gray circle with a checkmark will be displayed next to its name in the Contents Menu. It's good practice to save your work occasionally or when you take a break from it.
- Publish – When you're ready to publish a topic, click the Publish button. A published topic will have a green circle with a checkmark next to its name in the Contents Menu. Publishing gives you a baseline against which to compare subsequent drafts.You can still change a topic after it is published.
To create a version of a protocol, all topics need to be published and show the green circle (see "21. Create a Version").
Notify Users
When you click Save Draft or Publish, you will be asked if you'd like to notify users by email. You can skip this step by clicking Skip Notifications or enter the information to email selected users:
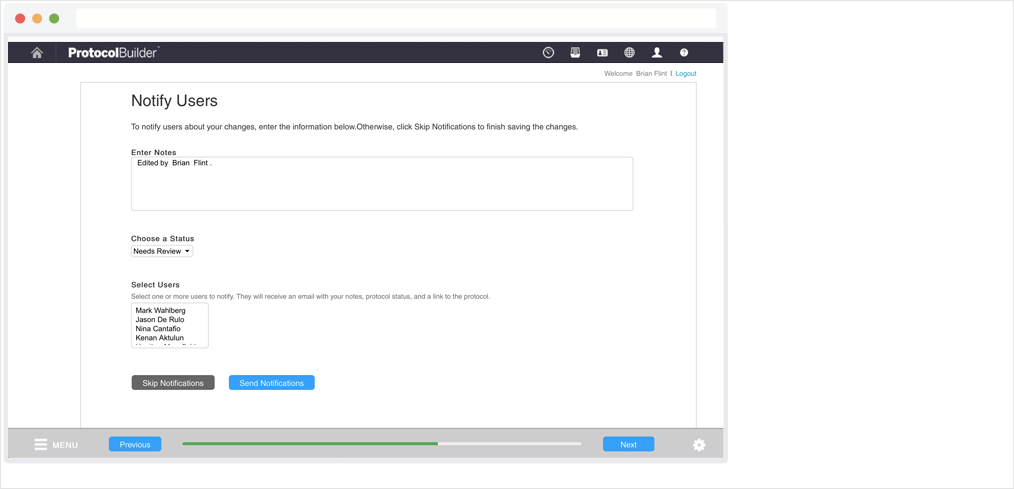
- Enter notes to explain any changes.
- Choose a status: Draft (Current), Published, Needs Review.
- Select users to notify and click Send Notifications.
14.Compare Revisions
When you're viewing a topic in Edit Mode, you can click the Compare Changes link in the top right corner of the text entry box to view revisions made to that topic. Please note that this link will not be available unless you have published this topic at least once.
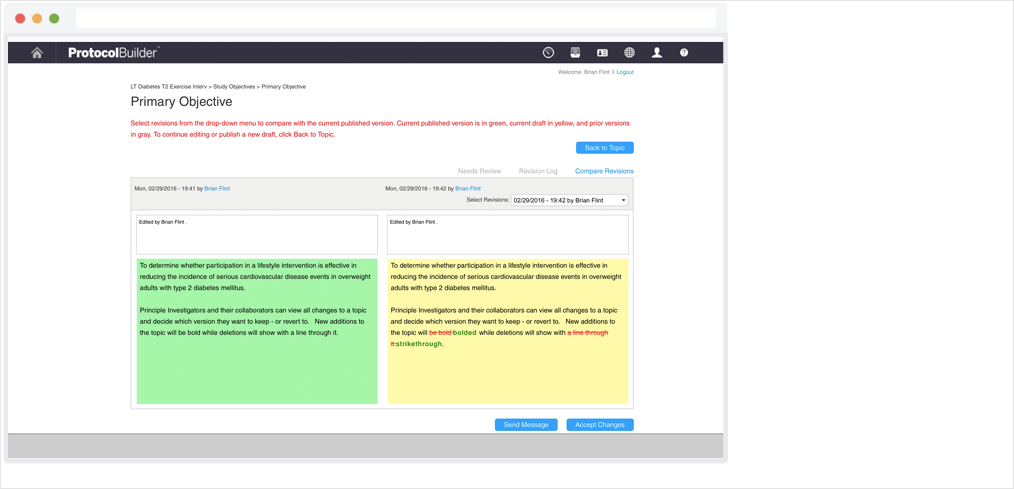
The table is color-coded:
| Color | Version |
|---|---|
| Green | Current Published Draft |
| Yellow | Current Saved Draft |
| Gray | Previous Saved Draft |
These options appear above the table:
- Drop-down Menu – Switch to a previous revisions for this topic, which are organized by time, date, and author.
- Back to Topic – Go back to Edit Mode for this topic.
- Needs Review – See a list of review tasks that have been assigned to you.
- Revisions Log – View a history of all revisions made to the topic.
You also have these options below the table:
- Accept Changes – Accept the revisions you are currently viewing.
- Send Message – Emails a message about the revisions to select users. Choose the users you want to email in the pop-up and type in the information.
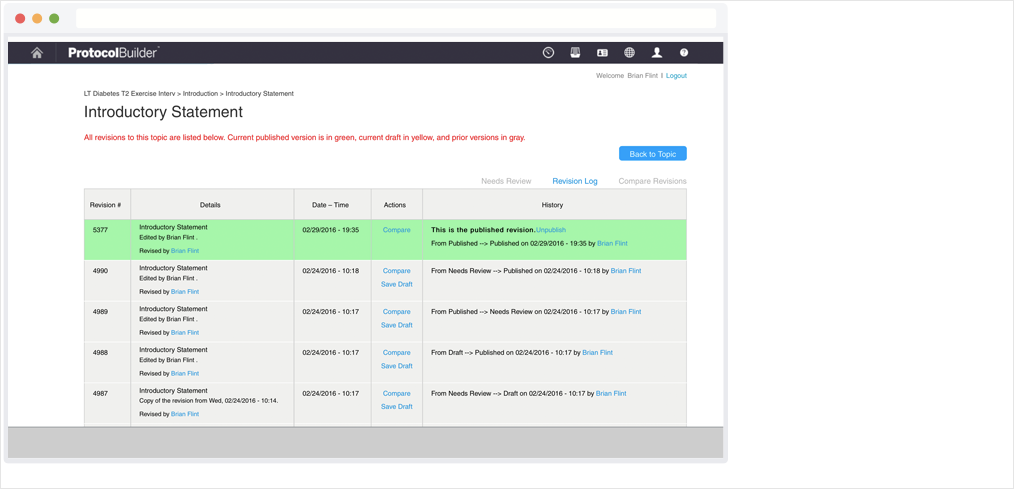
15. Revisions Log
The Revisions Log displays a history of all revisions made to a topic. The list is color-coded the same way as the Compare Revisions screen:
| Color | Version |
|---|---|
| Green | Current Published Draft |
| Yellow | Current Saved Draft |
| Gray | Previous Saved Version |
These options appear above the table:
- Back to Topic – Go back to Edit Mode for this topic.
- Needs Review – See a list of review tasks that have been assigned to you.
- Revisions Log – View a history of all revisions made to the topic.
16. Needs Review
This screen is a "task list" that shows all of the topic revisions you've been requested to review. Click the Topic Title to go directly to the topic and review it. You can also search by Topic Title or sort the list by clicking a header.
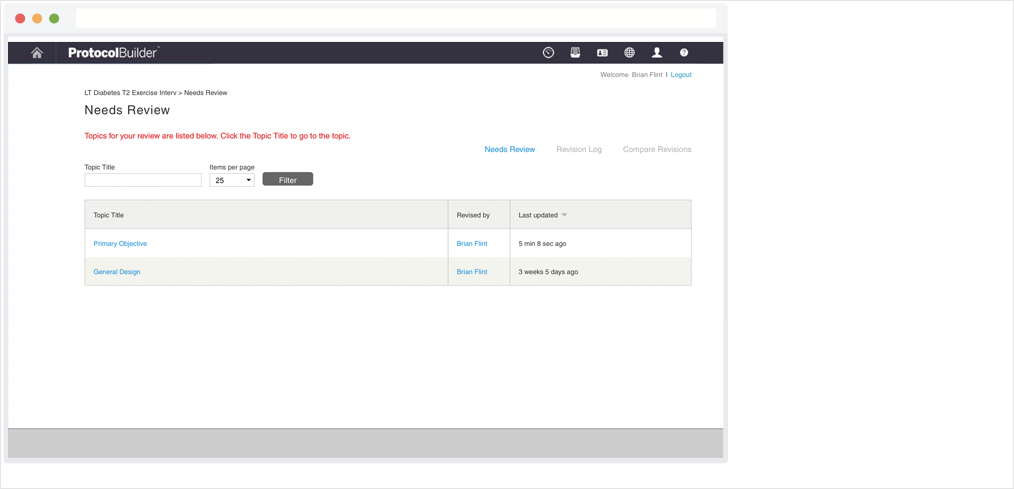
These options also appear above the table:
- Needs Review – See a list of review tasks that have been assigned to you.
- Revisions Log – View a history of all revisions made to the topic.
17. Dashboard
The Dashboard gives you an overview of the entire protocol, including the percentage of each section that has been completed.
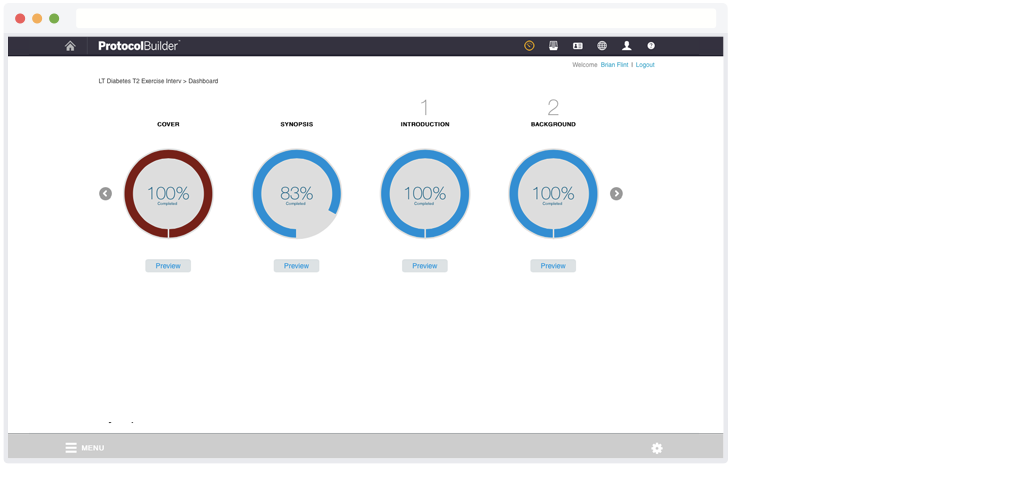
- To go to the Dashboard, click the Dashboard icon in the top right of the screen. You will only see this icon when you are viewing or editing a protocol.
- Use the arrows on the right and left to scroll through the protocol sections.
- Click Preview below any section to go directly to that section in Preview Mode.
18. Preview Mode
When you click Preview on the Dashboard or Preview Protocol in the gear icon in the bottom right corner, you'll see a preview of the entire protocol. This streamlined view allows you to read through it more easily.
You can also preview specific sections of the protocol by clicking the Preview button that appears in the top right corner of the page. Please note this button only appears when text has been entered and saved in that section.
When you're in Preview Mode, you can click on an Edit link or button to return to editing mode, which allows you to enter or revise text.
19. Preview, Share, and Download
Click the gear icon at the bottom right of the screen to access these features:
- Preview Protocol – View the entire protocol in Preview mode. If you'd like to edit when you're in Preview mode, click the Edit button at the top right of the screen. You'll need Editor or Writer User Role permissions to access Edit Mode.
- Invite to Review – Send an email that invites individuals to review the protocol. They can add comments directly into the protocol, which helps make feedback easier to track and manage.
- Share by Email – Email a PDF version of the protocol.
- Create PDF – Download a PDF version of the protocol.
- Create Word file – Download a Microsoft Word version of the protocol.
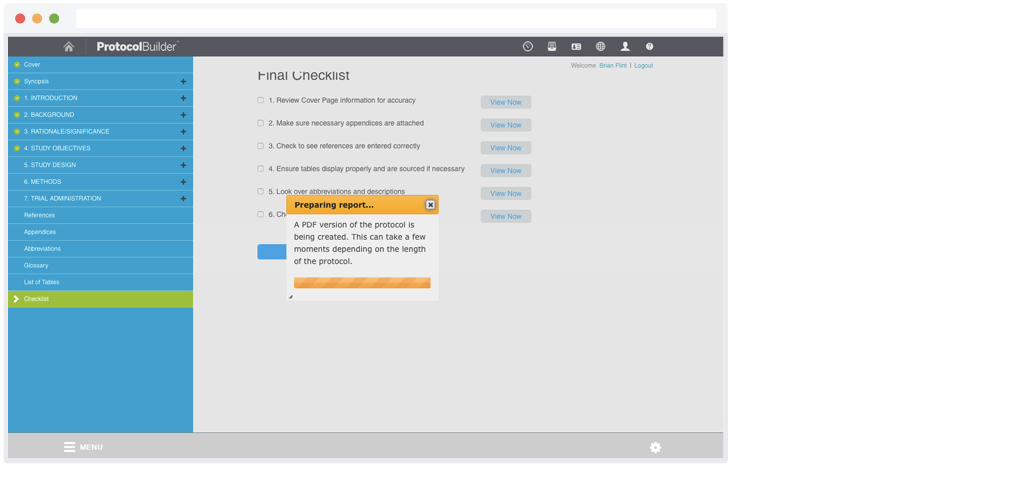
20. Final Checklist
The Final Checklist helps you finalize your protocol and make sure it's complete:
- Click Checklist in the Contents Menu or Dashboard to go to the Final Checklist.
- Review the steps and check off the ones that are complete.
- If you need to revisit a step, click the adjacent View Now button to go directly to that section of the protocol. When you return to the checklist, you'll need to check off the completed steps again.

When the checklist is complete, you can click Create Version to create a numbered version of your protocol (see "21. Create a Version").
21. Create a Version
Creating a version of your protocol saves it with a version number to help you manage the revision process. All versions of a protocol are listed on the Cover Page (in Preview Mode). You can click on a version to view it.
You can create a version from the Final Checklist or Cover Page (in Preview Mode) screen. All topics must be complete and published before you can create a version. You can check this by opening the Contents Menu and looking over the topic titles:
- If all titles have a green circle with a checkmark, you are ready to create a version.
- If any titles have a gray circle with a checkmark, you will need to go back to them and click publish before you can create a version.
- If any titles do not have a circle icon, they have not been written yet. You will need to write those topics and publish them before you can create a version.
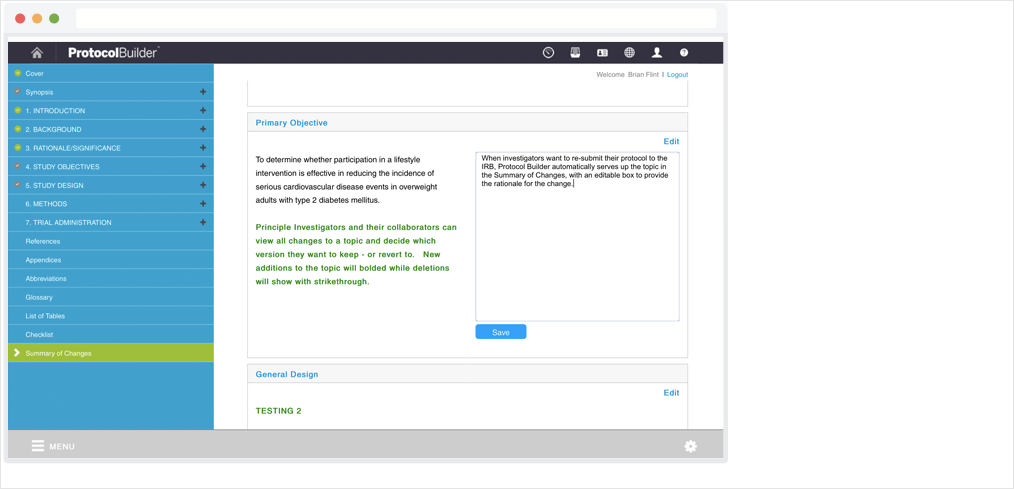
22. Summary of Changes
If you need to make changes and resubmit a protocol for approval, you can use the Summary of Changes screen to explain your revisions. This can make the resubmission process easier.
- Click to open the Contents Menu and select Summary of Changes (at the bottom). This option will only appear after at least one version of the protocol has been created.
- Any changes made since the last version was created will appear on the left side of the Summary of Changes screen. You can enter a specific rationale next to each change on the right.
- If you need to make additional changes, click the topic name to go directly to that topic in the protocol.
- If you want to edit a rationale that has already been saved, click the Edit link.
Add a Summary of Changes Section
There is an On/Off toggle switch next to the Summary of Changes option in the Contents Menu. Slide it "On" if you want to add the Summary of Changes as a section in the protocol. Slide it "Off" if you would prefer not to include this section.
View Previous Summary of Changes
If a protocol has multiple versions, you can go back and view a Summary of Changes for previous versions. Just select the version number you would like to see.
23. Protocol List
Click the Protocols icon in the top right of any screen to see your list of protocols and perform any of the following actions:
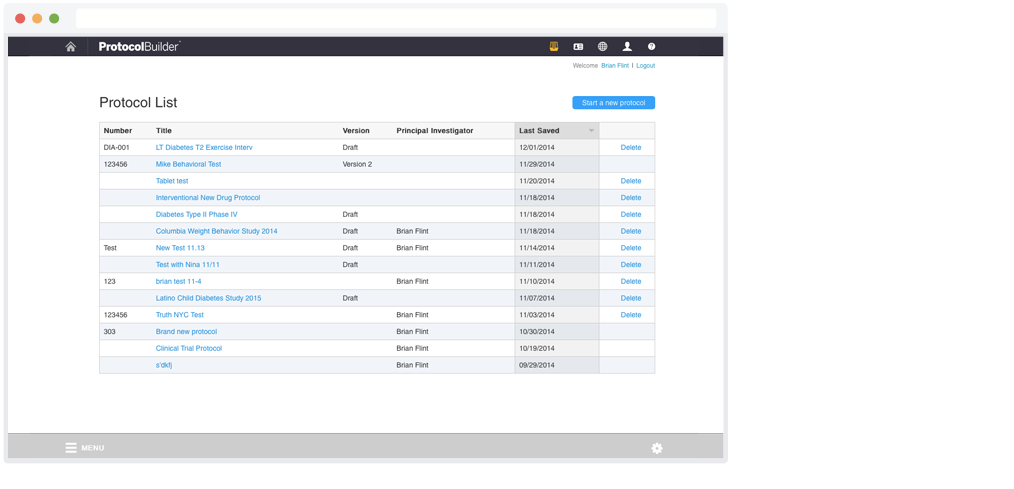
- Find a Protocol – Click any header to sort the list and look for a specific protocol.
- Open a Protocol – Click the file name.
- Delete a Protocol – Click the Delete button in that row.
- Start a New Protocol – Click the "Start a new protocol" button above the table to the right.
24. Contacts
Click the Contacts icon in the top right of any screen to manage your list of contacts in one convenient place.
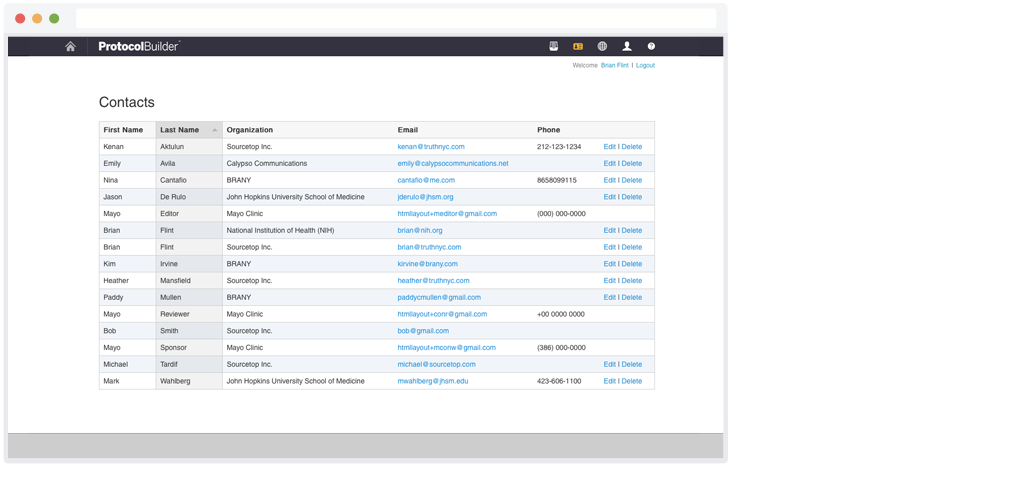
- Find a Contact – Click any header to sort the list and look for a specific contact.
- Edit a Contact – Click the Edit button to go to the Contact Details page, which is described in the following section.
- Delete a Contact – Click the Delete button.
- Add a New Contact – Click the Add New Contact button above the table to the right.
24-a. Contact Details
Click the Contact icon in the top right of the screen to see your list of contacts, then click Edit to view the Contact Details.
- Update User Details – Make any changes and click Save at the bottom.
- Update Address – Click on Address at the left. Make any changes and click Save at the bottom.
- Cancel Changes – Click Cancel to cancel any changes you made.
25. Profile
Click the Profile icon in the top right of the screen to access your user details and contact information.
- Update User Details – Make any changes and click Save at the bottom.
- Change Email or Password – Click the reset password link and you will receive an email with instructions to change your password. If you'd like to update your email, please contact the Help Desk at 844-563-1042 or manish@simplygraphix.com.
- Update Address – Click on Address at the left. Make any changes and click Save at the bottom.
- Cancel Changes – Click Cancel to cancel any changes you made.
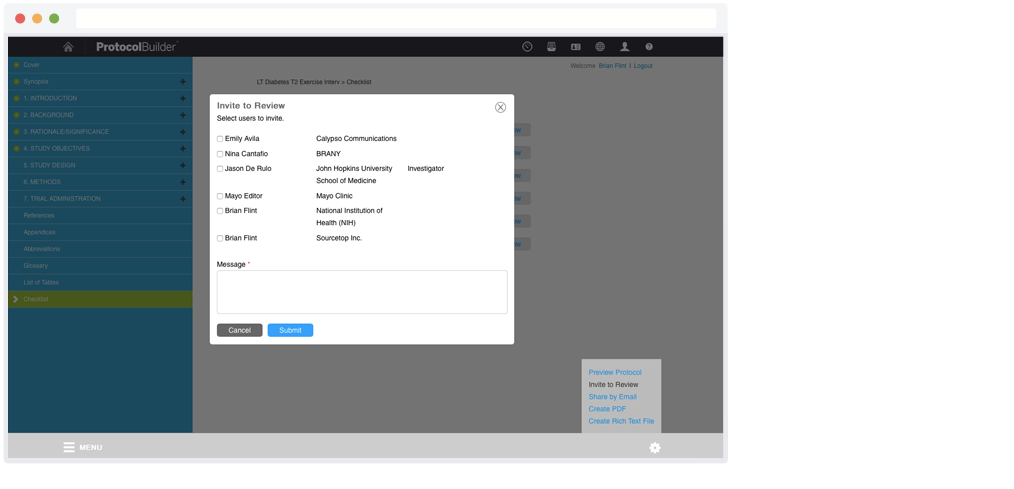
26. Review and Comment
You can invite people to review a protocol by clicking the gear icon in the bottom right and selecting Invite to Review. An email will be sent to reviewers with a link to the protocol and simple instructions. Reviewers can add comments to specific sections as they read the protocol.
Invite to Review
- Click the gear icon in the bottom right of the screen.
- Select Invite to Review.
- Enter the emails of the individuals you'd like to invite to review and click Send. An invitation email will be sent out with a link to view and comment on the protocol.
View, Add and Reply to Comments
- Click the Comment icon in the top right corner of a section. The Comments box will open with any previously saved comments and replies.
- Click Add New at the top to add a new comment. Click the Reply link to reply to a specific comment.
- To cancel and return to the protocol, click Cancel at the top of the Comments box.
27. Technical Issues and Support
If you're having technical issues or need additional support, please contact the Help Desk:
Phone: 844-563-1042
Email: help@protocolbuilderpro.com